The Sweet Symphony of Pavlova: A Culinary Journey Through New Zealand and Australia
Related Articles
- A Journey Through The Aromatic World Of Pho: A Culinary Adventure In Every Bowl
- A Journey Through Flavor: Unveiling The Secrets Of Greek Zucchini Fritters (Kolokithokeftedes)
- The Allure Of The Croissant: A Journey Through The History, Technique, And Delight Of This French Icon
- Spicy Fusion: Making Jamaican Jerk Chicken With A Modern Twist
- Pulled Pork: A Journey Through American Barbecue
Introduction
Join us as we explore The Sweet Symphony of Pavlova: A Culinary Journey Through New Zealand and Australia, packed with exciting updates
The Sweet Symphony of Pavlova: A Culinary Journey Through New Zealand and Australia
/australian-pavlova-recipe-256101-hero-01-f0bd5d2a3f0b4ec383fe8d16b8600bc9.jpg)
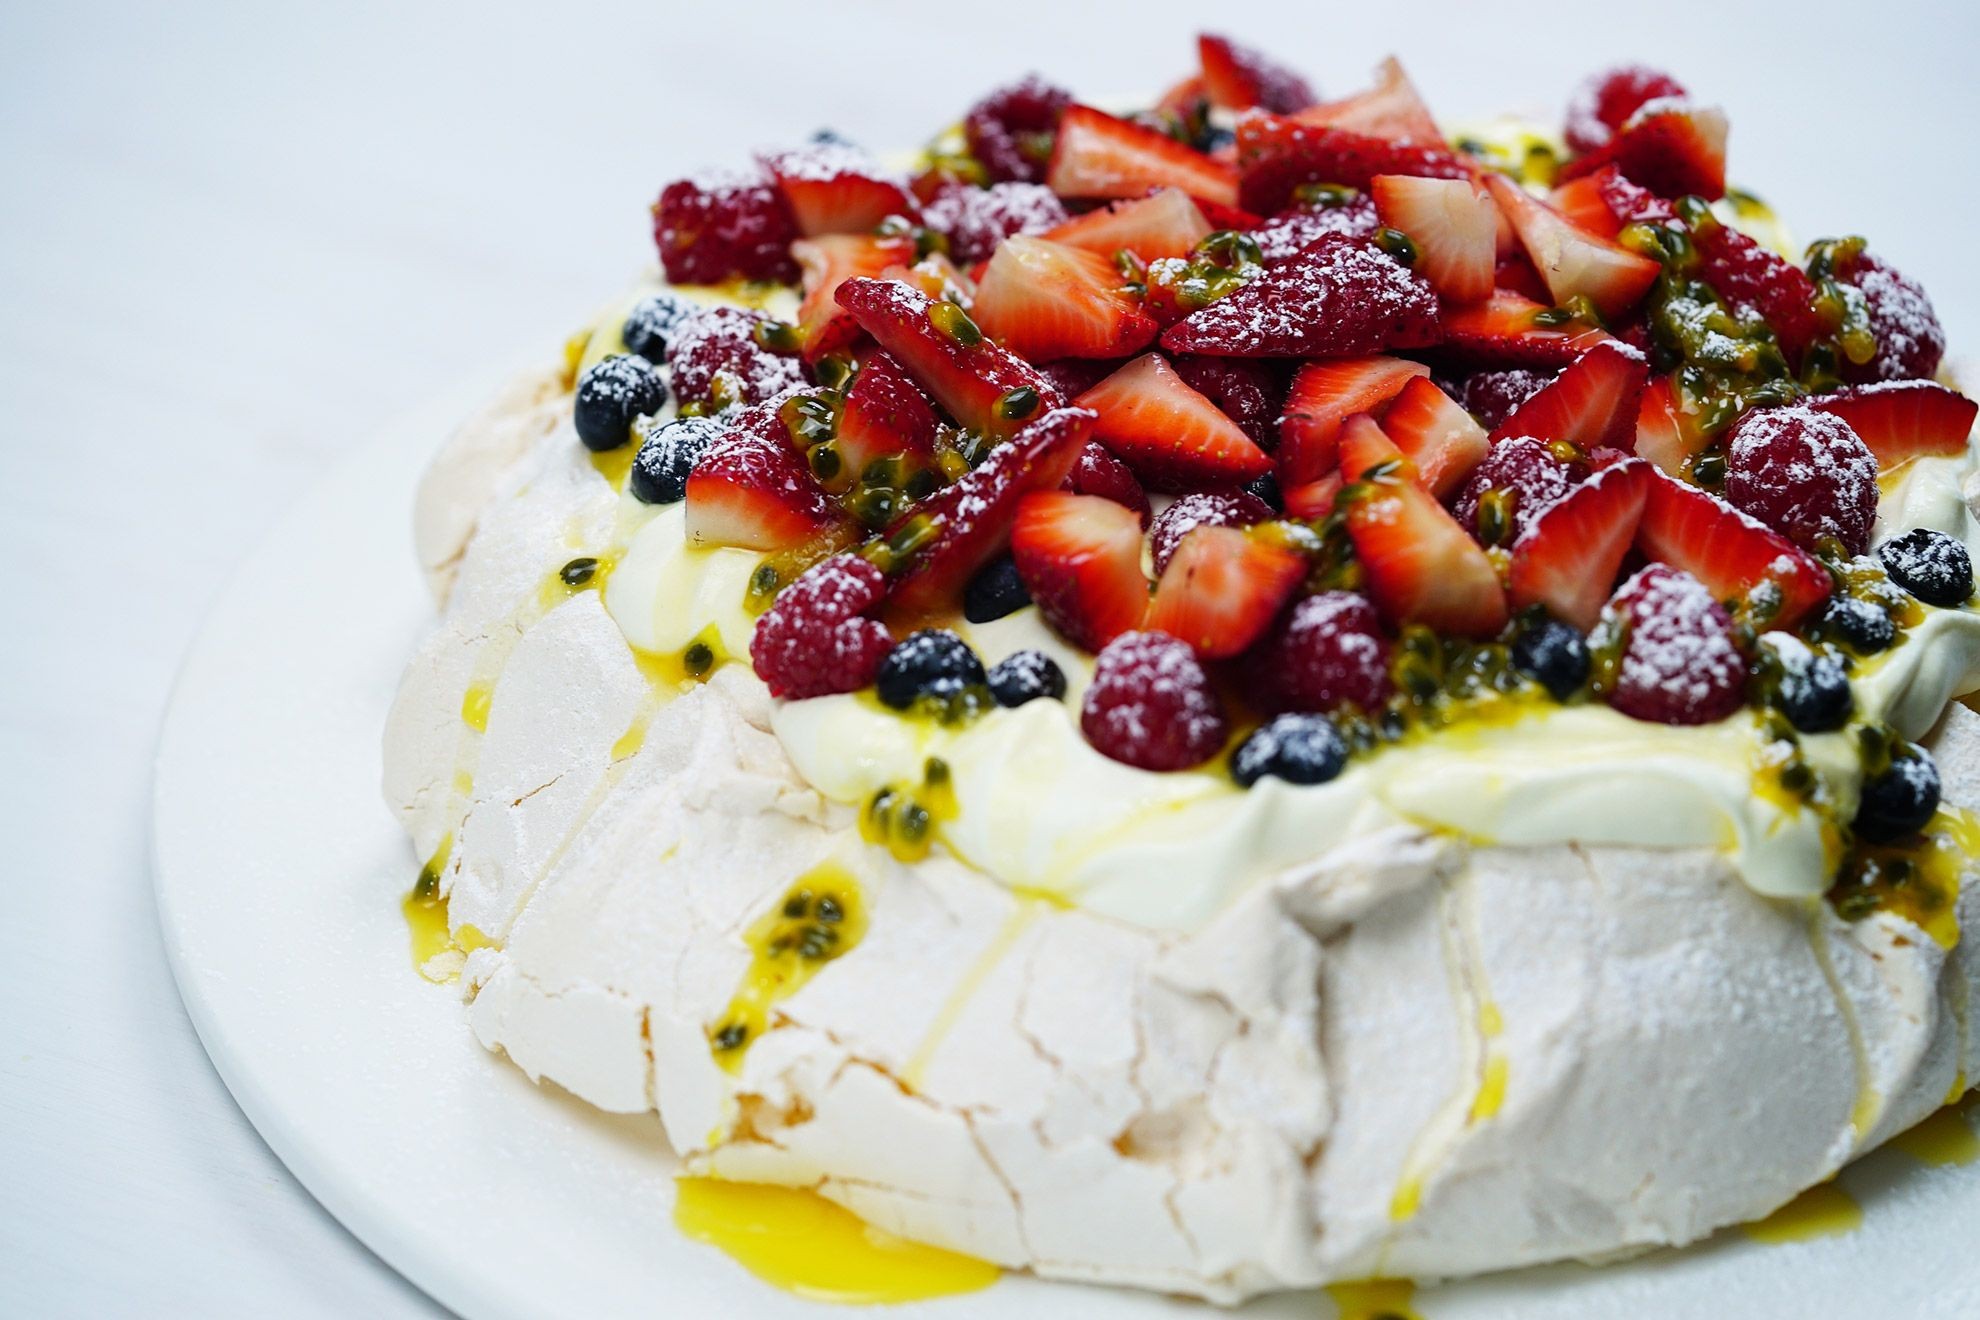
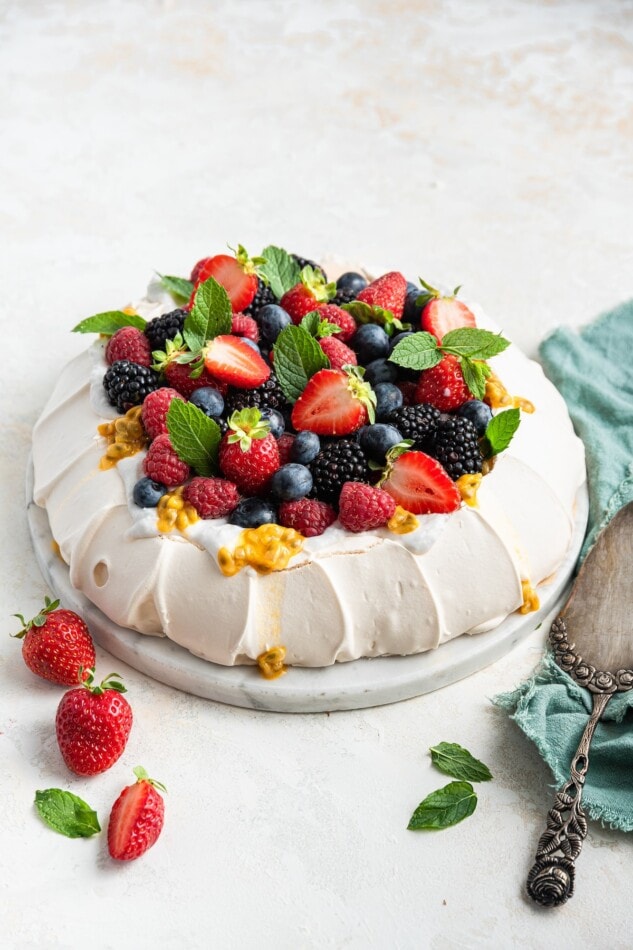
The pavlova, a stunningly beautiful and delicately delicious dessert, is a culinary icon of both New Zealand and Australia. This meringue-based masterpiece, with its crisp exterior and pillowy soft interior, is a testament to the ingenuity and sweet tooth of these two nations. But beyond its simple elegance, the pavlova holds a fascinating history, interwoven with national pride and culinary debate.
A Culinary Mystery: The Origins of Pavlova
The origins of the pavlova are shrouded in mystery, a delicious enigma that continues to spark debate between New Zealand and Australia. While both countries claim the dessert as their own, the exact origins remain elusive.
New Zealand’s Claim:
New Zealanders proudly proclaim the pavlova as their national dessert, citing its creation in 1926 by chef, “Chef” (name was not found) at the Hotel Bristol in Wellington. This claim is supported by a 1926 article in the Evening Post newspaper, which mentions a "new dessert" named "Pavlova" created by the hotel’s chef. However, this article provides no details about the recipe or its inspiration.
Australia’s Counterclaim:
Australia, however, also lays claim to the pavlova’s invention, arguing that it was created in 1935 by a chef at the Hotel Australia in Sydney. This claim is based on a 1935 article in the Sydney Morning Herald, which mentions a "new dessert" named "Pavlova" created by the hotel’s chef. However, the article doesn’t provide any details about the recipe or its inspiration.
The Debate Continues:
The debate over the pavlova’s origins continues to this day, with both countries presenting compelling evidence for their claims. The lack of definitive documentation and the absence of a single, universally accepted recipe only fuel the fire of this delicious rivalry.
Beyond the Origins: The Pavlova’s Enduring Appeal
Regardless of its true birthplace, the pavlova has become a beloved dessert in both New Zealand and Australia. Its delicate texture, sweet flavor, and versatility have made it a staple at family gatherings, celebrations, and summer barbecues.
The pavlova’s popularity stems from its:
- Versatility: It can be dressed up or down, with toppings ranging from classic whipped cream and fruit to decadent chocolate ganache and exotic berries.
- Visual Appeal: The pavlova’s snowy white exterior and airy texture make it a visually stunning centerpiece for any dessert table.
- Ease of Preparation: While the meringue base requires some attention, the overall process is relatively simple, making it a manageable dessert for even novice bakers.
The Essential Ingredients: Decoding the Pavlova
The pavlova is essentially a meringue base, which is then topped with a variety of ingredients. The key to a successful pavlova lies in understanding the essential ingredients and their roles in creating the perfect texture and flavor.
1. Egg Whites: The foundation of the pavlova is the egg whites, which are beaten to stiff peaks to create the meringue’s airy structure. Fresh, cold egg whites are essential for achieving stable peaks, as they contain more protein and are less prone to collapsing.
2. Sugar: Sugar plays a crucial role in the pavlova’s texture and sweetness. It is added gradually to the beaten egg whites, stabilizing the meringue and adding sweetness. The type of sugar used can influence the final texture and sweetness of the pavlova.
3. Cornstarch: A small amount of cornstarch is often added to the meringue mixture, which helps to create a crisp outer shell and a soft, pillowy interior.
4. Cream of Tartar: Cream of tartar is a common ingredient in meringue recipes, acting as a stabilizer and helping to prevent the meringue from collapsing. It also helps to enhance the meringue’s gloss and texture.
5. Vanilla Extract: A touch of vanilla extract adds a subtle sweetness and a hint of warmth to the pavlova.
6. Toppings: The toppings are the ultimate expression of creativity and personal preference. From classic whipped cream and fruit to decadent chocolate ganache and exotic berries, the possibilities are endless.
Mastering the Art of Meringue: Tips and Techniques
Making a perfect pavlova requires attention to detail and a few essential techniques. Here’s a guide to mastering the art of meringue:
1. Egg Whites:
- Freshness is key: Use fresh, cold egg whites for optimal results. Cold egg whites are more stable and easier to beat to stiff peaks.
- Separate with care: Separate the egg whites from the yolks carefully, ensuring no yolk contamination. Even a tiny bit of yolk can prevent the egg whites from whipping properly.
- Cleanliness is crucial: Use a clean bowl and beaters to ensure that no grease or oil remains, as these can also hinder the whipping process.
2. Whipping Technique:
- Start slowly: Begin whipping the egg whites on low speed, gradually increasing the speed as the egg whites start to foam.
- Add sugar gradually: Add the sugar gradually, one tablespoon at a time, allowing the egg whites to incorporate the sugar before adding more.
- Achieve stiff peaks: Continue whipping until the egg whites form stiff peaks, which means they hold their shape when the beaters are lifted.
- Don’t overwhip: Overwhipping can lead to a dry, crumbly meringue.
3. Baking the Pavlova:
- Preheat oven: Preheat the oven to 250°F (120°C).
- Create the base: Spread the meringue mixture into a circle or a desired shape on a baking sheet lined with parchment paper.
- Bake gently: Bake the pavlova for 1-1.5 hours, or until the outside is crisp and the inside is soft and marshmallow-like.
- Cool completely: Allow the pavlova to cool completely in the oven with the door slightly ajar.
4. Assembling the Pavlova:
- Top with care: Once the pavlova has cooled completely, gently top it with whipped cream, fruit, and other desired toppings.
- Serve immediately: For the best results, serve the pavlova immediately after assembling, as the meringue can become soggy if it sits for too long.
Recipes for a Perfect Pavlova: A Culinary Journey Through Flavor
The beauty of the pavlova lies in its versatility. Here are a few recipe variations to embark on a culinary journey through flavor:
1. Classic Pavlova with Whipped Cream and Berries:
Ingredients:
- 4 large egg whites
- 1 cup granulated sugar
- 1 teaspoon cornstarch
- 1/4 teaspoon cream of tartar
- 1 teaspoon vanilla extract
- 1 cup heavy whipping cream
- 1 cup fresh berries (such as strawberries, raspberries, blueberries)
Instructions:
- Preheat oven to 250°F (120°C). Line a baking sheet with parchment paper.
- In a clean, dry bowl, beat egg whites with an electric mixer on low speed until foamy. Gradually add sugar, one tablespoon at a time, while beating on medium speed, until stiff peaks form.
- Add cornstarch, cream of tartar, and vanilla extract, and beat on low speed until combined.
- Spread the meringue mixture onto the prepared baking sheet in a circle or desired shape.
- Bake for 1-1.5 hours, or until the outside is crisp and the inside is soft.
- Turn off the oven and let the pavlova cool completely in the oven with the door slightly ajar.
- In a separate bowl, beat heavy whipping cream until stiff peaks form.
- Top the cooled pavlova with whipped cream and fresh berries. Serve immediately.
2. Chocolate Pavlova with Ganache and Raspberries:
Ingredients:
- 4 large egg whites
- 1 cup granulated sugar
- 1 teaspoon cornstarch
- 1/4 teaspoon cream of tartar
- 1 teaspoon vanilla extract
- 1 cup dark chocolate, chopped
- 1/2 cup heavy cream
- 1 cup fresh raspberries
Instructions:
- Preheat oven to 250°F (120°C). Line a baking sheet with parchment paper.
- In a clean, dry bowl, beat egg whites with an electric mixer on low speed until foamy. Gradually add sugar, one tablespoon at a time, while beating on medium speed, until stiff peaks form.
- Add cornstarch, cream of tartar, and vanilla extract, and beat on low speed until combined.
- Spread the meringue mixture onto the prepared baking sheet in a circle or desired shape.
- Bake for 1-1.5 hours, or until the outside is crisp and the inside is soft.
- Turn off the oven and let the pavlova cool completely in the oven with the door slightly ajar.
- In a small saucepan, heat heavy cream over medium heat until simmering. Remove from heat and add chopped chocolate, stirring until smooth.
- Top the cooled pavlova with chocolate ganache and fresh raspberries. Serve immediately.
3. Tropical Pavlova with Mango and Passionfruit:
Ingredients:
- 4 large egg whites
- 1 cup granulated sugar
- 1 teaspoon cornstarch
- 1/4 teaspoon cream of tartar
- 1 teaspoon vanilla extract
- 1 cup heavy whipping cream
- 1 ripe mango, diced
- 1/2 cup passionfruit pulp
Instructions:
- Preheat oven to 250°F (120°C). Line a baking sheet with parchment paper.
- In a clean, dry bowl, beat egg whites with an electric mixer on low speed until foamy. Gradually add sugar, one tablespoon at a time, while beating on medium speed, until stiff peaks form.
- Add cornstarch, cream of tartar, and vanilla extract, and beat on low speed until combined.
- Spread the meringue mixture onto the prepared baking sheet in a circle or desired shape.
- Bake for 1-1.5 hours, or until the outside is crisp and the inside is soft.
- Turn off the oven and let the pavlova cool completely in the oven with the door slightly ajar.
- In a separate bowl, beat heavy whipping cream until stiff peaks form.
- Top the cooled pavlova with whipped cream, diced mango, and passionfruit pulp. Serve immediately.
Tips for a Perfect Pavlova: Embracing the Art of Baking
Creating a perfect pavlova is a delightful culinary adventure, but it requires a little patience and attention to detail. Here are some tips to ensure your pavlova is a masterpiece:
1. The Importance of Freshness:
- Use fresh, cold egg whites for the best results.
- Make sure your bowl and beaters are clean and grease-free. Even a tiny bit of grease can prevent the egg whites from whipping properly.
2. Mastering the Meringue:
- Beat the egg whites gradually, adding sugar slowly to ensure the meringue is stable and holds its shape.
- Don’t overwhip the egg whites, as this can result in a dry, crumbly meringue.
3. Baking with Precision:
- Preheat the oven to 250°F (120°C) and bake the pavlova for 1-1.5 hours, or until the outside is crisp and the inside is soft.
- Allow the pavlova to cool completely in the oven with the door slightly ajar. This helps to prevent the meringue from cracking.
4. Assembling with Care:
- Top the cooled pavlova with whipped cream, fruit, and other desired toppings just before serving.
- Serve the pavlova immediately, as the meringue can become soggy if it sits for too long.
5. Storage and Serving:
- Store any leftover pavlova in an airtight container in the refrigerator.
- The pavlova is best served the day it is made. However, it can be stored in the refrigerator for up to 24 hours.
6. Embracing Creativity:
- Experiment with different toppings and flavor combinations to create your own unique pavlova.
- Don’t be afraid to get creative and try new things.
The Pavlova: A Culinary Legacy
The pavlova, with its simple elegance and endless possibilities, is a testament to the culinary ingenuity of New Zealand and Australia. This dessert, with its crisp exterior and pillowy soft interior, has captured hearts and palates around the world. Whether you’re a seasoned baker or a culinary novice, the pavlova offers a delightful opportunity to explore the world of flavors and textures. So, gather your ingredients, embrace the joy of baking, and create your own masterpiece of sweetness and delight. The pavlova awaits!
Closure
We hope this article has helped you understand everything about The Sweet Symphony of Pavlova: A Culinary Journey Through New Zealand and Australia. Stay tuned for more updates!
Don’t forget to check back for the latest news and updates on The Sweet Symphony of Pavlova: A Culinary Journey Through New Zealand and Australia!
We’d love to hear your thoughts about The Sweet Symphony of Pavlova: A Culinary Journey Through New Zealand and Australia—leave your comments below!
Stay informed with our next updates on The Sweet Symphony of Pavlova: A Culinary Journey Through New Zealand and Australia and other exciting topics.